
Can you fix dog scratches on a leather couch? Yes, you absolutely can! This guide will show you how to mend dog scratches on leather furniture quickly and effectively, helping you restore scratched leather sofa and keep your cherished piece looking its best. We’ll explore various methods, from simple DIY solutions to using specialized products, ensuring you can fix pet damage leather furniture with confidence.
Your beloved leather couch is more than just furniture; it’s a cozy spot for relaxation, a centerpiece for your living room, and a comfortable haven for your furry friend. However, those adorable paws that bring so much joy can sometimes leave behind not-so-joyful marks in the form of scratches on your leather. Don’t despair! With the right approach, you can effectively repair these blemishes and keep your leather couch looking pristine. This comprehensive guide will walk you through the process of how to repair dog scratches on a leather couch fast, covering everything from identifying the type of scratch to the final conditioning.
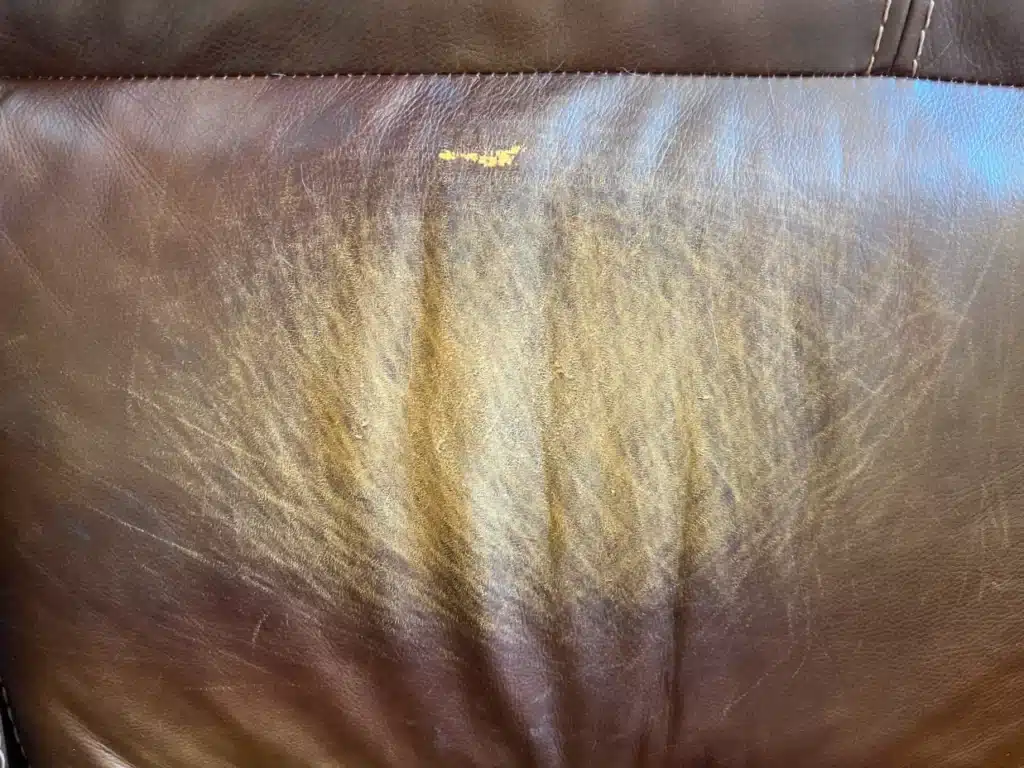
Image Source: rubnrestore.com
Gauging the Depth of the Damage
Before you can fix pet damage leather furniture, it’s crucial to determine how deep the scratches are. This will dictate the best repair method.
Light Surface Scratches
These are the most common and usually superficial. They often look like light lines or discoloration on the leather’s surface. They haven’t penetrated the leather’s dye or structure.
Moderate Scratches
These scratches are deeper. You might see a change in the leather’s texture or a slight lifting of the grain. The color might be affected, but the leather itself hasn’t been torn through.
Deep or Punctured Scratches
These are the most severe. The claws have likely gone through the top layer of the leather, and you might see raw fibers or even a tear. These require more intensive repair.
Essential Tools and Materials for Leather Scratch Repair
Having the right supplies on hand makes the process of how to repair dog scratches on a leather couch fast and efficient.
The Must-Haves:
- Leather Cleaner: To prepare the area.
- Soft, Lint-Free Cloths: For cleaning, applying products, and buffing.
- Vacuum Cleaner with Brush Attachment: To remove loose debris from scratches.
- Leather Repair Kit: This is your all-in-one solution for many repairs. Look for kits that include colorants, fillers, and applicators.
- Leather Scratch Filler or Compound: Specifically designed to fill and smooth out deeper scratches.
- Leather Dye or Colorant: To match the original color of your couch if the scratch has removed the dye.
- Fine-Grit Sandpaper (e.g., 2000-3000 grit): For very gently smoothing edges of deeper scratches (use with extreme caution).
- Leather Conditioner: Crucial for restoring moisture and protecting the leather after repair.
- Rubbing Alcohol (Isopropyl Alcohol): For cleaning and degreasing surfaces (use sparingly).
- Hair Dryer: To speed up drying times for certain products.
- Small Spatula or Applicator Tool: Often included in leather repair kits for applying fillers.
- Gloves: To protect your hands.
DIY Leather Repair: Step-by-Step Guide to Mending Dog Scratches
This section focuses on the practical steps to mend dog scratches leather, from preparation to the final touches.
Step 1: Cleaning the Damaged Area
This is a critical first step to ensure any repair product adheres properly and to remove any dirt or debris that could interfere with the repair.
- Gentle Cleaning: Use a dedicated leather cleaner. Apply a small amount to a soft cloth and gently wipe the scratched area and the surrounding leather. Avoid harsh scrubbing.
- Drying: Allow the area to air dry completely. You can use a hairdryer on a low, cool setting to speed this up if needed, but keep it at a distance to prevent overheating the leather.
Step 2: Addressing Light Surface Scratches
For minor scuffs and scratches, often a good cleaning and conditioning are all that’s needed.
Using Leather Conditioner: The Gentle Approach
Sometimes, the “scratch” is just a surface abrasion that has displaced the leather’s natural oils.
- Apply Conditioner: Put a small amount of high-quality leather conditioner onto a clean, soft cloth.
- Massage In: Gently massage the conditioner into the scratch and the surrounding leather in a circular motion.
- Buff: Let the conditioner sit for a few minutes, then buff the area with a clean, dry cloth. The oils in the conditioner can help to blend the scratch and restore the leather’s natural sheen. This method is excellent for restoring scratched leather sofa surfaces that have lost their luster.
Using Leather Scratch Removal Cream: A Targeted Solution
There are specific creams designed to tackle minor scratches and scuffs.
- Application: Apply a small amount of the leather scratch removal cream to a clean cloth.
- Work Gently: Gently rub the cream into the scratch, following the direction of the scratch itself.
- Buff: Allow the cream to penetrate for a few minutes, then buff the area with a clean, dry cloth until the scratch is less visible. This can be a very fast way to fix pet damage leather furniture for minor imperfections.
Step 3: Repairing Moderate Scratches
These require a bit more intervention.
Employing a Leather Repair Balm: Filling and Blending
A good leather repair balm can fill in minor abrasions and help blend the damage.
- Clean and Dry: Ensure the area is thoroughly cleaned and dried.
- Apply Balm: Use a soft cloth or the applicator provided with the balm to gently work it into the scratch. Follow the product’s instructions, as some may require gentle rubbing while others are best applied as a light layer.
- Smooth: Use a clean cloth to gently smooth out any excess balm.
- Dry/Cure: Allow the balm to dry or cure according to the product’s instructions. Some may benefit from a gentle heat from a hairdryer on a cool setting.
- Buff: Once dry, buff the area with a clean, soft cloth.
Using a Leather Scratch Filler: For Deeper Lines
When the scratch has some depth, a leather scratch filler is your best bet.
- Preparation: Clean and dry the area thoroughly. If the edges of the scratch are raised, you can very gently try to flatten them with a fingernail or the edge of a credit card, but avoid further damage.
- Apply Filler: Using the applicator tool provided (or a small spatula), carefully apply the leather scratch filler into the scratch. Work it in to ensure it fills the entire depth of the scratch. Aim for a smooth surface that is level with the surrounding leather.
- Leveling: Use the applicator to gently smooth the filler, removing any excess that sits above the leather’s surface.
- Drying: Allow the filler to dry completely. Drying times vary greatly depending on the product. A hairdryer on a low, cool setting can sometimes help speed this up, but be patient.
- Sanding (Optional and With Extreme Caution): If the dried filler is slightly raised, you can very carefully and gently sand it down using extremely fine-grit sandpaper (2000-3000 grit). This is a delicate step; too much pressure will create more damage. Lightly sand only the raised area until it is flush with the leather surface. Always test this on an inconspicuous area first.
- Cleaning: Gently wipe away any dust from sanding with a soft, slightly damp cloth.
Step 4: Color Matching and Application
If the scratches have removed the dye, you’ll need to recolor the area.
Matching the Leather Dye: The Art of Precision
This is where careful observation is key to achieving an invisible leather repair.
- Test Color: If your kit comes with multiple colors, start mixing small amounts on a piece of paper or a spare piece of leather (if you have any) to find the perfect match for your couch.
- Apply Dye: Use a fine-tipped applicator or a very small brush to apply the matching dye to the repaired area. Build up thin layers, allowing each to dry before applying the next. This prevents the dye from pooling in the scratch and looking unnatural.
- Feather Edges: When applying, gently feather the edges of the dye to blend it seamlessly into the surrounding leather.
- Drying: Allow the dye to dry completely between coats. A hairdryer on a cool setting can be used cautiously.
Step 5: Sealing and Protection
Once the dye is dry, you need to protect your repair.
Applying a Leather Sealer or Finish
Most leather repair kits include a sealant or topcoat to protect the repaired area and give it a uniform sheen.
- Apply Sealer: Using a clean cloth or applicator, apply a thin, even layer of the sealer over the repaired and recolored area.
- Buff: Once the sealer is dry, gently buff the area with a clean, dry cloth to achieve a smooth, natural finish.
Step 6: Leather Conditioning After Repair
This is a vital step that many overlook. Leather needs moisture to remain supple and healthy.
Replenishing Moisture for Longevity
- Apply Conditioner: Once all repair steps are complete and everything is dry, apply a good quality leather conditioner over the entire couch, or at least the repaired section and its surroundings. This helps blend the repaired area and prevents the rest of the leather from drying out and cracking, especially if you used alcohol.
- Buff: After allowing the conditioner to soak in for the time recommended by the manufacturer, buff the entire couch with a clean, soft cloth. This will restore the leather’s natural sheen and protect it.
Using a Professional Leather Couch Repair Kit
For many situations, a comprehensive leather couch repair kit is the most efficient and effective way to mend dog scratches leather. These kits are designed to provide all the necessary components for a successful DIY leather repair.
What to Look for in a Leather Couch Repair Kit:
- Color Matching System: Crucial for achieving an invisible leather repair.
- Leather Filler Compound: For filling deeper scratches.
- Applicator Tools: Spatulas, brushes, sponges.
- Leather Cleaner and Degreaser: To prepare the surface.
- Leather Dye or Colorant: To restore color.
- Topcoat/Sealer: To protect the repair.
- Detailed Instructions: Essential for beginners.
When you invest in a quality leather repair kit, you’re investing in the longevity and appearance of your furniture. These kits provide a structured approach to how to repair dog scratches on a leather couch fast, making the process less daunting.
Tips for an Invisible Leather Repair
Achieving an invisible leather repair requires patience and attention to detail.
- Work in Good Light: Natural daylight is best for accurate color matching and application.
- Patience is Key: Don’t rush any step. Allow products to dry and cure fully.
- Test Products First: Always test cleaners, dyes, fillers, and sealers on an inconspicuous area of the couch (like the back or underside) to ensure they don’t alter the color or texture.
- Build Layers: For fillers and dyes, thin layers are always better than one thick application.
- Feather Edges: This applies to both fillers and dyes. Blend the edges into the surrounding leather to avoid visible lines.
- Don’t Over-Sand: If sanding is necessary, use the finest grit possible and be extremely gentle.
Preventing Future Damage: Keeping Paws at Bay
While repairing is essential, prevention is always the best strategy for how to repair dog scratches on a leather couch fast – or ideally, not needing to repair at all!
Proactive Measures for Pet Owners:
- Regular Nail Trimming: Keep your dog’s nails trimmed short. This is the most effective way to reduce the severity of scratches.
- Provide Scratching Alternatives: Ensure your dog has appropriate scratching posts or toys.
- Provide a Designated Bed: Encourage your dog to use their own bed or blanket on the couch.
- Leather Protection Sprays/Coatings: Some products can add a protective layer to your leather, making it more resistant to minor scratches. Research these carefully to ensure they are suitable for your specific leather type.
- Covering Vulnerable Areas: For temporary protection, you can use throws or blankets on your couch, especially when your dog is unsupervised.
When to Call a Professional
While DIY methods can be very effective, there are times when professional help is recommended.
Recognizing the Need for Expert Intervention:
- Very Large or Deep Tears: If the damage extends across a significant area or involves a tear in the leather.
- Delicate or Exotic Leather Types: Some leathers are very sensitive and can be easily damaged by incorrect repair methods.
- If You’re Unsure: If you’re not confident in your ability to perform the repair, it’s better to seek professional assistance to avoid causing further damage.
- Antique or Valuable Furniture: For irreplaceable pieces, professional restoration is often the wisest choice.
FAQ: Your Leather Scratch Repair Questions Answered
Here are some common questions people have when looking to fix pet damage leather furniture.
Q1: Will all leather scratch removers work on my couch?
A1: No, it’s crucial to identify your leather type first (e.g., aniline, semi-aniline, pigmented, nubuck, suede). Some products are designed for specific leather types. Always test a product on an inconspicuous area before applying it to the visible scratches.
Q2: Can I use shoe polish to fix leather couch scratches?
A2: It’s generally not recommended. Shoe polish is designed for shoes and may not have the correct flexibility, color-matching capabilities, or compatibility with furniture leather, potentially causing more damage or an uneven finish. Stick to products specifically designed for furniture leather.
Q3: How long does it take for leather filler to dry?
A3: Drying times vary significantly depending on the brand and type of filler. Some can dry in as little as 15-30 minutes, while others may require several hours or even overnight. Always refer to the product’s instructions for the most accurate drying times.
Q4: How do I know if I need a leather dye or a leather filler?
A4: If the scratch has only altered the surface sheen or color slightly, a leather scratch removal cream or balm might suffice. If the scratch has removed the color layer, leaving the base leather visible or lighter, you will need to use a leather dye after filling the scratch with a filler.
Q5: Is it possible to achieve an invisible leather repair?
A5: With patience, the right products, and careful application, it is often possible to achieve a repair that is very difficult to see, if not entirely invisible. The key is precise color matching and blending the repair seamlessly with the surrounding leather.
Q6: What’s the best way to remove deep scratches?
A6: Deep scratches usually require a two-step process. First, use a leather filler to fill the void and create a smooth surface. Once the filler is dry and potentially lightly sanded smooth, you’ll need to use a matching leather dye to recolor the area. Finally, seal the repair and condition the leather.
By following these detailed steps and tips, you can confidently tackle those unwanted dog scratches and restore your leather couch to its former glory, making your DIY leather repair a success. Remember, consistent maintenance and prevention are your best allies in keeping your furniture looking its best for years to come.