
Can you fix dog scratches on a leather couch? Yes, you can! Most superficial dog claw marks on leather can be successfully repaired with the right techniques and products, making your beloved couch look much better. This guide will walk you through the steps for DIY leather repair and provide solutions for various types of damage.
Dealing with dog claw marks on leather can be disheartening, especially when your furry friend accidentally leaves their mark on your favorite furniture. But before you consider reupholstering or replacing your couch, know that many types of damage are fixable. This article will equip you with the knowledge and tools to tackle those pesky scratches and restore your leather to its former glory.
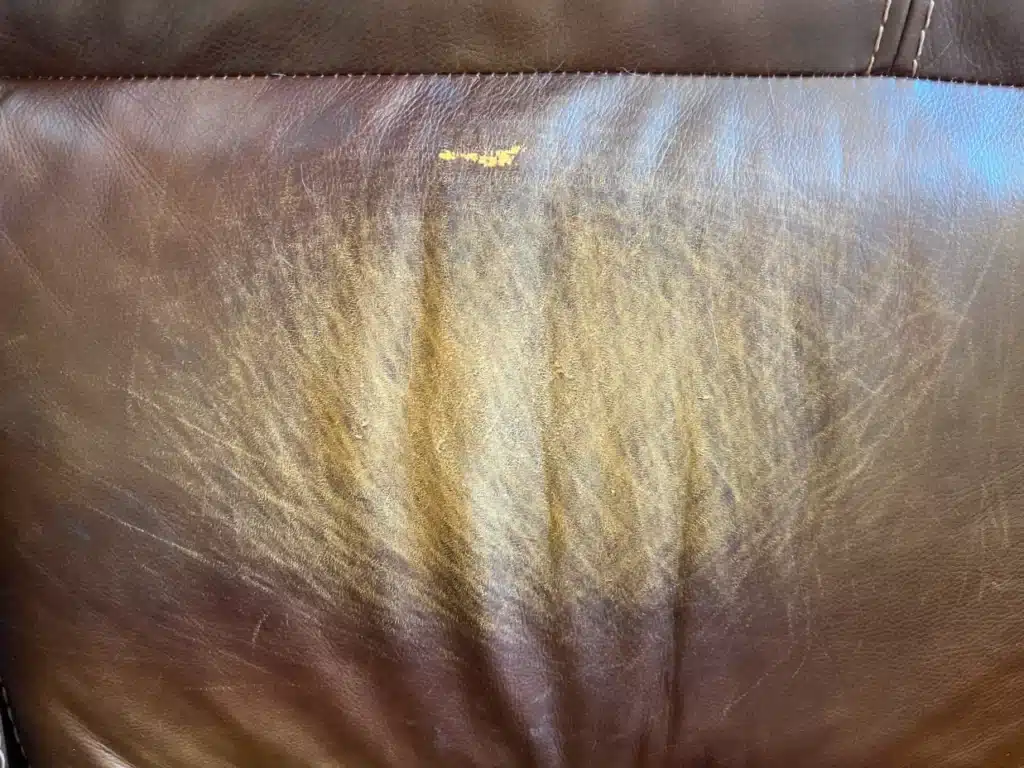
Image Source: rubnrestore.com
Assessing the Damage: What Kind of Scratch Are We Dealing With?
The first step in repairing damaged leather is to accurately assess the extent of the damage. Not all scratches are created equal, and the depth and type of scratch will dictate the best repair method.
Types of Leather Scratches
- Surface Scratches: These are the most common and easiest to fix. They typically affect only the top layer of the leather, often appearing as light scuffs or white lines. You can usually feel them as a slight indentation if you run your fingernail over them.
- Deep Scratches: These penetrate further into the leather, potentially reaching the dye or even the underlying material. They are more noticeable and require more robust repair techniques.
- Gouges: These are more severe than deep scratches, involving actual material loss from the leather. Fixing gouges in leather often requires filling the damaged area.
- Tears and Punctures: While not strictly scratches, these are often caused by claws and involve a break in the leather material itself.
Identifying Leather Type
It’s crucial to know what type of leather your couch is made from, as this will influence the repair products you choose.
- Aniline Leather: This is natural, dyed leather with minimal or no protective coating. It’s very soft and luxurious but also prone to staining and scratching. Repairs often involve color matching and conditioning.
- Semi-Aniline Leather: This leather has a thin protective coating that offers more durability than aniline leather but still retains a natural feel.
- Pigmented (Protected) Leather: This is the most common type for furniture. It has a thick protective coating that makes it resistant to stains and scratches. Repairs are often simpler as the coating can be re-applied.
- Nubuck/Suede: These are buffed leathers with a velvety nap. Repairs for these are different and often require specialized cleaners and brushes, and the goal is usually to lift the nap rather than fill in damage. This guide focuses primarily on smooth leathers.
Essential Tools and Materials for Leather Scratch Repair
Having the right supplies on hand is key to a successful repair. Here’s a breakdown of what you might need:
The Basic Leather Repair Kit
A good leather repair kit is often the most efficient way to get started, especially for beginners. These kits typically contain:
- Leather Cleaner: To prepare the surface.
- Leather Filler/Compound: For deeper scratches and gouges.
- Colorant/Dye: To match the original color of your couch.
- Applicator Tools: Spatulas, sponges, or brushes.
- Sealer/Finish: To protect the repaired area.
Additional Supplies
- Soft Cloths: Microfiber cloths are ideal for cleaning and buffing.
- Rubbing Alcohol (Isopropyl Alcohol): For cleaning stubborn marks and preparing the surface. Use sparingly and test in an inconspicuous area first.
- Fine-Grit Sandpaper (e.g., 600-1000 grit): For very light smoothing of edges on deeper scratches, if needed.
- Leather Conditioner: Crucial for restoring moisture and flexibility after repairs. Using a good leather conditioner for scratches can help blend minor scuffs.
- Cotton Swabs: For precise application of cleaners or colorants.
- Gloves: To protect your hands.
- Hair Dryer (Optional): To speed up drying times between steps.
- Color Chart/Sample: If your kit doesn’t include one, or if you need to custom-mix colors.
Step-by-Step Guide: Tackling Dog Scratches
Let’s get to work on fixing dog scratches on your leather couch!
Step 1: Clean the Area Thoroughly
This is a critical first step. Any dirt or debris left on the leather will interfere with the repair process and can even be ground into the leather during application.
- Dust Removal: Use a dry, soft cloth to wipe away any loose dust and debris from the scratched area and its surroundings.
- Gentle Cleaning: Dampen a clean cloth with a specialized leather cleaner or a mild soap solution (a few drops of pH-neutral soap in water). Wring out the cloth so it’s just damp, not wet.
- Wipe Gently: Wipe the scratched area and a slightly larger surrounding area in a gentle, circular motion. Avoid scrubbing, which can worsen the damage.
- Rinse (if using soap): Use a separate clean cloth dampened with plain water to wipe away any soap residue.
- Dry Completely: Pat the area dry with a clean, dry cloth. Allow the leather to air dry completely before proceeding. You can use a hairdryer on a low, cool setting to speed this up, holding it at a distance.
Step 2: Addressing Surface Scratches
For those frustrating but common light scuffs that haven’t broken the leather’s surface:
Method A: Leather Conditioner
Sometimes, a good conditioning is all that’s needed.
- Apply Conditioner: Put a small amount of high-quality leather conditioner for scratches onto a clean, soft cloth.
- Rub In: Gently rub the conditioner into the scratched area using circular motions.
- Buff: Let the conditioner soak in for a few minutes, then buff the area with a clean, dry cloth. The oils in the conditioner can help to rehydrate the leather, sometimes making minor scratches disappear or become much less noticeable. This is a great initial step for light damage.
Method B: Leather Rejuvenator/Scratch Remover Product
There are specific products designed as a leather scratch remover.
- Test First: Always test any product on an inconspicuous area of the couch (like the back or underside) to ensure it doesn’t alter the color or finish.
- Apply According to Instructions: Apply a small amount of the product to a clean cloth or cotton swab.
- Work Gently: Gently rub the scratch, working from the outside of the scratch towards the center.
- Buff: Buff the area with a clean cloth once the product has been worked in. Repeat if necessary, but avoid over-application.
Step 3: Repairing Deeper Scratches
When the scratch has penetrated the top layer or removed some color:
Method A: Using a Leather Repair Kit with Filler
This is where a couch scratch filler comes into play.
- Prepare the Scratch: Ensure the area is clean and dry (as per Step 1). If the edges of the scratch are raised, you can very gently try to smooth them down with a fingernail or a rounded blunt object. For very stubborn raised edges, a tiny bit of very fine-grit sandpaper (600-1000 grit) might be used, but be extremely cautious not to damage the surrounding leather.
- Apply Leather Filler: Using a small spatula or applicator from your leather repair kit, carefully apply a thin, even layer of the leather filler or compound into the scratch. Don’t overfill; you want it to be flush with the surface.
- Smooth and Level: Use the spatula to smooth the filler, ensuring it fills the scratch completely and is level with the surrounding leather. Wipe away any excess filler from the surface immediately with a damp cloth.
- Dry: Allow the filler to dry completely according to the kit’s instructions. This can take anywhere from 30 minutes to several hours. A hairdryer on a low, cool setting can help speed up drying.
- Second Coat (if needed): For deeper scratches, you may need to apply a second thin coat of filler after the first has dried. Repeat the smoothing and drying process.
- Light Sanding (Optional): Once completely dry, if the filled area is slightly raised or uneven, you can very lightly sand it with the fine-grit sandpaper. The goal is to make it perfectly flush with the surrounding leather. Wipe away any dust.
Method B: Using Leather Touch-Up Paint
This method is often used after filling or for scratches that have removed color but haven’t deeply damaged the leather structure.
- Color Matching: This is the most crucial part. Your leather repair kit may include a color chart, or you might need to custom-mix shades to perfectly match your couch. Test your custom mix on a hidden area or a piece of paper.
- Apply Leather Touch-Up Paint: Using a fine brush or sponge applicator, carefully apply the leather touch-up paint into the scratch or over the filled area.
- Build Layers: Apply thin layers rather than one thick coat. Allow each layer to dry completely before applying the next. A hairdryer on a cool setting can speed this up.
- Feather Edges: As you apply the paint, try to feather the edges slightly to blend it seamlessly with the surrounding leather.
- Seal (if necessary): Once the color is satisfactory and fully dry, you might need to apply a leather sealant or finish from your kit to protect the repair and give it a uniform sheen.
Step 4: Fixing Gouges and Tears
Fixing gouges in leather that have removed material requires a bit more effort, often involving a leather patching kit or a more substantial filler.
Method A: Using a Leather Patch
For more significant tears or gouges where material is missing:
- Clean and Prepare: Clean the area thoroughly. Trim any loose threads or frayed edges from the tear with small, sharp scissors.
- Cut a Patch: Select a piece of leather from your leather patching kit that is slightly larger than the damaged area. If your kit doesn’t have patches, you can often buy leather scraps. Try to match the grain and color as closely as possible.
- Apply Adhesive: Apply a strong, flexible leather adhesive (often included in kits or sold separately) to the underside of the patch and around the edges of the damaged area on the couch.
- Position and Press: Carefully position the patch over the damaged area. Press down firmly, ensuring good contact. Use a roller or the back of a spoon to press the patch firmly into place, especially around the edges.
- Weight Down: Place a heavy object (like a book or a block of wood) on top of the patch for several hours or overnight to ensure a strong bond.
- Fill and Color (if needed): Once the adhesive is dry, you may still see the edges of the patch or have some minor imperfections. You can use leather filler and touch-up paint (as described in Step 3) to smooth over the patch and blend its color with the rest of the couch.
Method B: Advanced Filler Techniques for Gouges
For gouges without large tears but significant material loss:
- Clean and Prepare: As always, clean the area.
- Apply Filler: Apply multiple thin layers of leather filler into the gouge, allowing each layer to dry and curing it according to instructions. You might need to build up the filler gradually to match the original level of the leather.
- Leveling: Use fine sandpaper or an abrasive pad to carefully level the dried filler with the surrounding leather. Take your time and check frequently.
- Color Matching and Application: Use leather touch-up paint to match the color of the filled area. Apply thin layers, allowing drying time between each, and feather the edges for a smooth transition.
- Finishing Coat: Apply a leather finish or sealant to protect the repair.
Step 5: Conditioning and Protection
After the repair is complete, it’s essential to condition the leather.
- Apply Leather Conditioner: Once all the repair materials are completely dry and cured, apply a good quality leather conditioner to the entire couch, or at least the repaired section and its surrounding panels. This helps to:
- Restore moisture and suppleness.
- Blend the repaired area visually.
- Protect the leather from future damage.
- Buff: After letting the conditioner soak in for the time recommended on the product, buff the entire couch with a clean, soft cloth for a uniform sheen.
Preventing Future Scratches
While repairs are possible, prevention is always better than cure, especially when dealing with enthusiastic pets.
- Provide Scratching Posts: Ensure your dog has plenty of appropriate scratching posts or alternatives.
- Trim Nails Regularly: Keep your dog’s nails trimmed and filed smooth. This is one of the most effective ways to minimize damage from accidental scratches.
- Use Protective Covers: Consider using durable throws or slipcovers on the areas of your couch that your dog frequents most.
- Discourage Climbing: Gently discourage your dog from jumping on or scratching the couch. Positive reinforcement training can be very effective.
- Regular Conditioning: Keep your leather couch well-conditioned. Supple leather is less prone to showing minor surface marks.
Frequently Asked Questions (FAQ)
Q: How long does it take to fix dog scratches on a leather couch?
A: The time can vary greatly depending on the severity of the scratches and the method used. Minor surface scratches might take just a few minutes of conditioning. Deeper scratches requiring filler and color matching could take anywhere from a couple of hours to a full day, including drying times between multiple thin coats.
Q: Can I use nail polish to fix leather scratches?
A: It’s generally not recommended. Nail polish is not designed for leather. It can dry stiffly, crack, peel, and alter the leather’s texture and breathability. It can also be very difficult to remove if the repair doesn’t work out, potentially causing more damage.
Q: What if I can’t match the leather color perfectly?
A: Color matching is often the trickiest part of DIY leather repair. Take your time. If your kit has a color mixing guide, follow it carefully. Consider bringing a small swatch of the leather (if possible from an inconspicuous area) to a specialty leather store for color matching advice. When in doubt, it’s often better to aim for a slightly darker shade if the repair is small, as it may blend better than a lighter shade that stands out. Sometimes, a slightly imperfect match is better than leaving the scratch visible.
Q: Are leather repair kits expensive?
A: Leather repair kits range in price from about $20 to $100 or more, depending on the quality, contents, and brand. Basic kits for surface repairs are usually more affordable than comprehensive kits designed for deep scratches and tears. Investing in a good quality kit for your specific leather type is usually worth the cost.
Q: What’s the difference between a leather filler and a leather patch?
A: A couch scratch filler or leather compound is a paste-like substance used to fill in cracks, scratches, or small depressions in the leather to create a smooth surface. A leather patching kit involves applying a piece of leather (often with adhesive backing) over a tear or a larger damaged area to structurally repair it, essentially covering the hole.
Q: My dog chewed the leather, not just scratched it. Can I fix that?
A: Chewing damage is more severe than scratches and often involves missing material and uneven edges. While you can attempt to repair it using a combination of filler and possibly a patch (depending on the extent of the damage), the results may not be as seamless as repairing simple scratches. For significant chewing damage, professional restoration might be a better option.
Q: How do I know if my leather couch is aniline or pigmented?
A: You can test this by putting a tiny drop of water on an inconspicuous area. If the water beads up, it’s likely pigmented (protected) leather. If the water soaks in and darkens the leather temporarily, it’s likely aniline or semi-aniline. Always test in a very small, hidden spot.
Q: Can I use shoe polish to repair leather scratches?
A: While some people have had success with certain types of shoe polish on specific leather types, it’s generally not recommended for furniture. Shoe polish is formulated for footwear and may not have the flexibility or colorfastness needed for upholstery. It could also rub off onto clothing. Stick to products specifically designed for leather furniture repair.
By following these detailed steps and using the right products, you can effectively address dog claw marks on leather and significantly improve the appearance of your couch, saving you money and the hassle of replacement. Remember to be patient and meticulous throughout the process for the best results.